 CH341A Mobile
User guide
How to connect, detect and program chips with CH341A Mobile
Before you start
- An Android 8.0 or newer phone with USB host (OTG), and an OTG adapter or cable.
- A CH341A USB programmer with a SOIC clip or a socket adapter for your chip. 1.8 V chips also need a 1.8 V adapter.
- The firmware file for your exact chip and device (BIN or Intel HEX). CH341A Mobile does not include firmware files.
- Charge the phone. A write must not be interrupted.
Chip orientation: pin 1 of the chip (the dot) goes to pin 1 of the clip or socket. A reversed chip is not detected and can be damaged.
First start
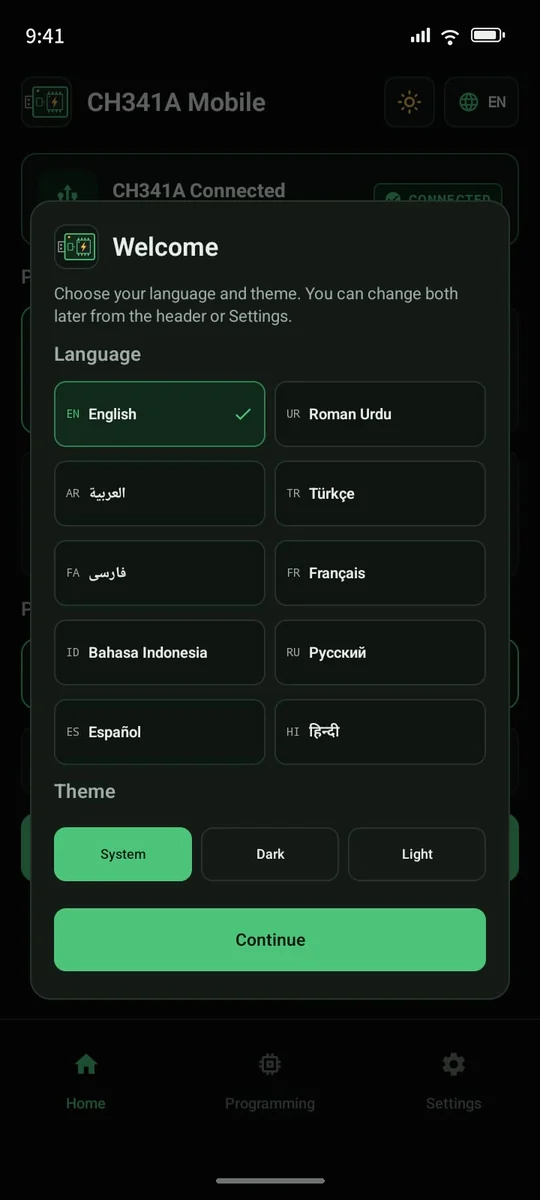
On first start, choose your language and theme (System, Dark or Light), then tap Continue. You can change both later with the language and Sun/Moon buttons in the header, or in Settings.
The app shows a few ads and, where the law requires it, Google's consent form. Ads never appear while an operation is running.
Connect the programmer
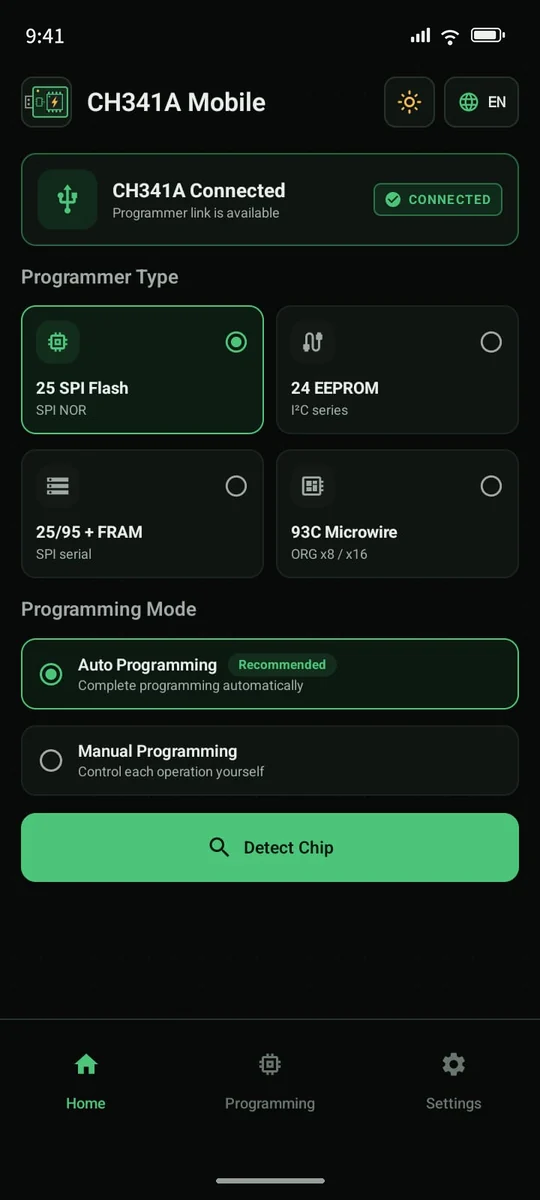
- Plug the CH341A into the phone with the OTG adapter.
- Allow USB access when Android asks. Tick always open so it does not ask again.
- Home shows CH341A Connected. If it does not, see Troubleshooting.
- Choose the Programmer Type: 25 SPI Flash, 24 EEPROM, 25/95 + F-RAM or 93C Microwire. For 24, 25/95 and 93C chips, choose the exact model or size.
Detect the chip
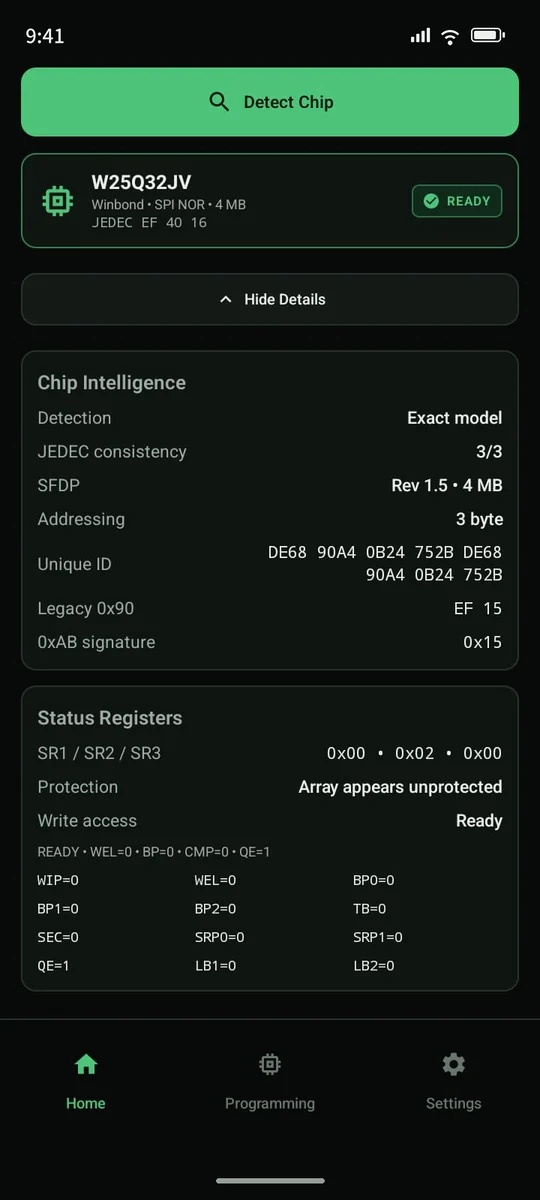
Choose Auto Programming (recommended) or Manual Programming, then tap Detect Chip (for 25/95 and 93C chips the button is Qualify). For SPI flash the app reads the chip's identity several times, checks the supply voltage and confirms that it can control the chip before anything is changed.
Open the details under the chip card to see the chip information: JEDEC ID, SFDP, addressing, unique ID and the status registers with the protection bits.
Auto programming
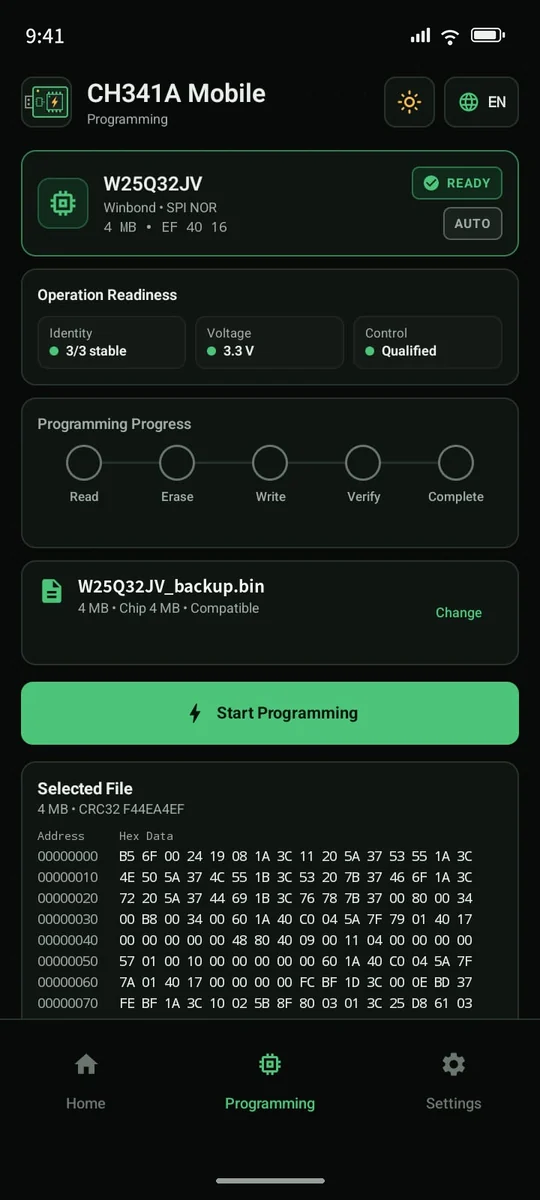
- Open the Programming tab and tap Select File. Pick the firmware with the Android file picker.
- The app checks the file: a file larger than the chip, or an invalid file, is refused. It is never cut or padded.
- Tap Start Programming. Auto runs Read → Erase → Write → Verify by itself.
- Keep the phone, cable and programmer still until the result appears. The operation continues with the screen off.
Progress and result
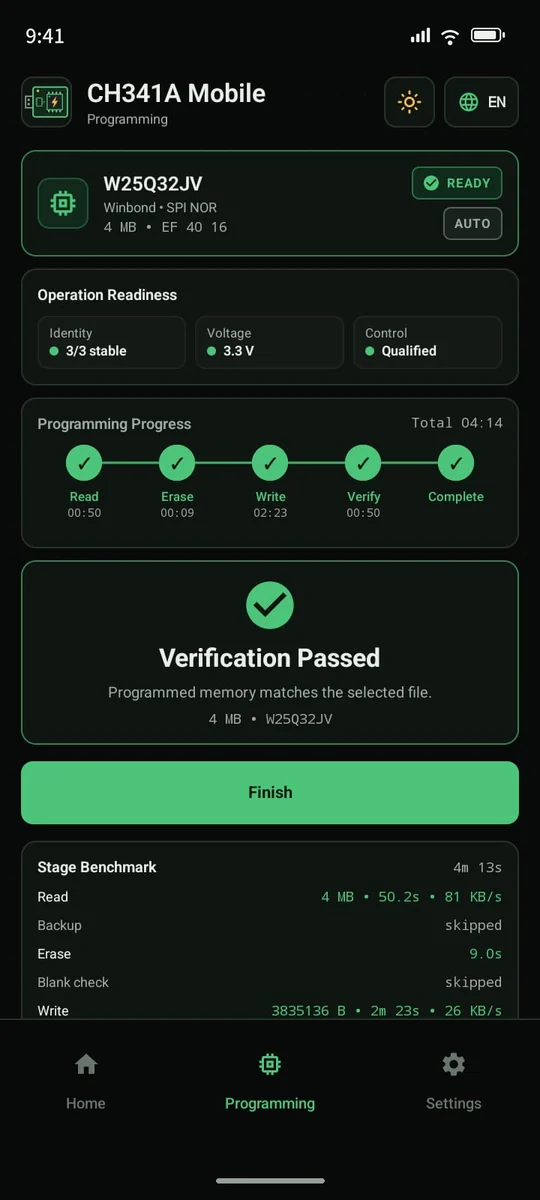
The tracker shows each step and its time. The progress card gives the speed, bytes done, time left and the current address. Cancel stops at a safe point.
Verification Passed means the chip was read back and matches your file byte for byte. If verify fails, the chip does not hold the file: improve the contact and program again. Do not use the device until a verify passes.
Hex viewer
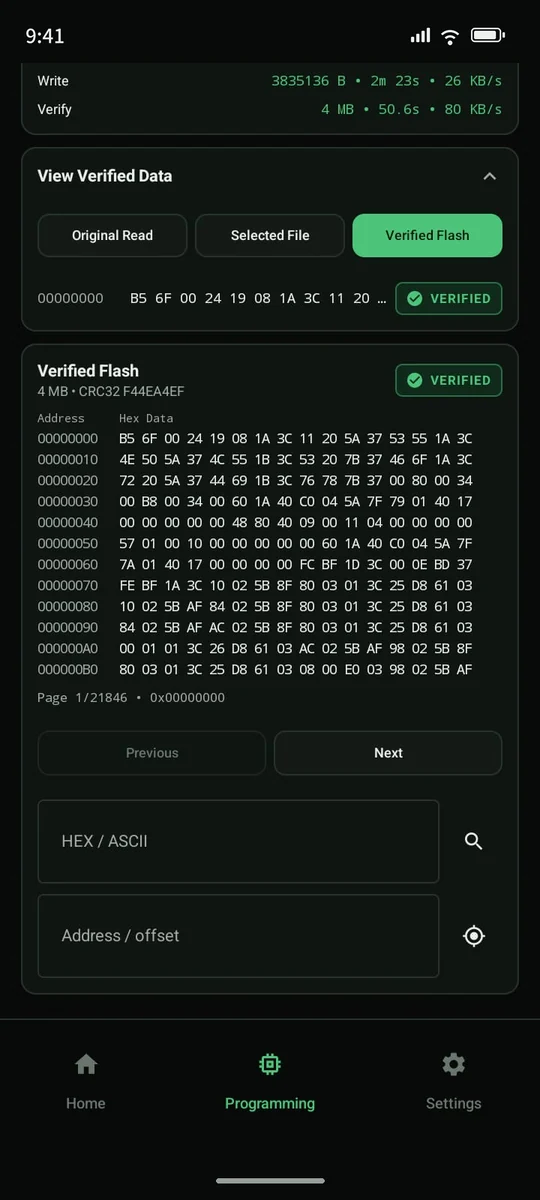
After an operation, View Verified Data opens the hex viewer. Switch between Original Read, Selected File and Verified Flash, page through the data, search HEX or ASCII, and jump to an address or offset.
Manual mode, backup and restore
Manual Programming gives you each step on its own: Read, Erase, Blank check, Write and Verify. Use it when you need only one step, for example to read and save a chip.
- Backup: read the chip and save it before you change it. Saved backups are listed in the app and can be written back later.
- Verify After Write is optional in Manual mode. Auto always verifies.
Settings
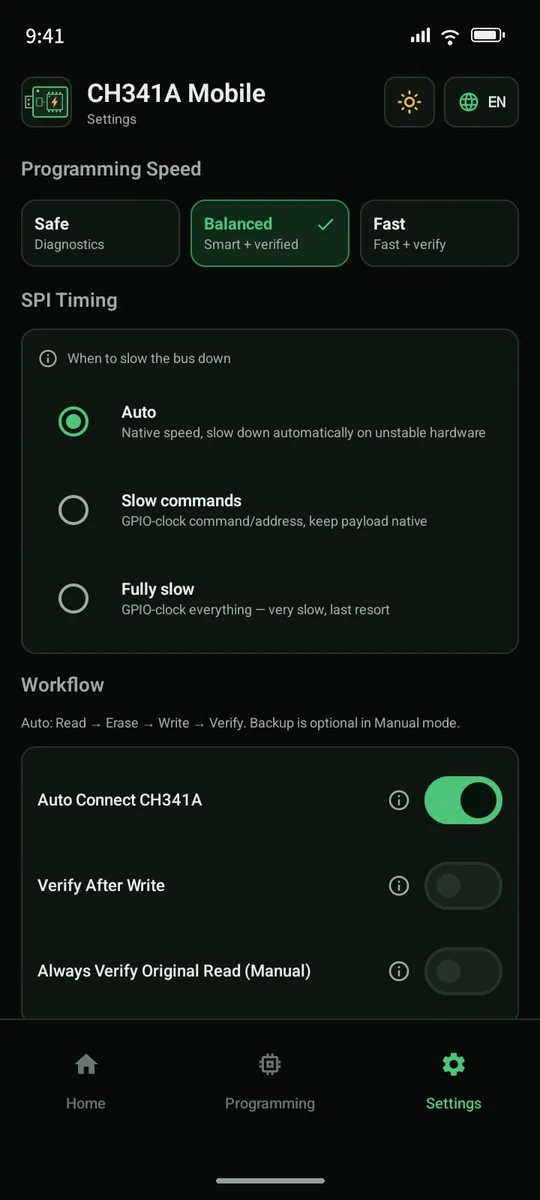
- Programming Speed: Safe (extra checks), Balanced (default) or Fast.
- SPI Timing: Auto (recommended) slows the bus down by itself on an unstable connection; Slow commands and Fully slow are for difficult setups, such as long wires or in-circuit clips.
- Electrical Safety: turn on External 1.8 V Adapter only when the adapter is fitted.
- Protection: Unprotect Protected Chips (on by default) clears write protection that would stop erase or write.
- Ads: watch one short video for 30 minutes without ads; Privacy & ad choices where the law requires it.
Troubleshooting
The programmer is not found
Try another OTG adapter or cable, then unplug and reconnect the CH341A. Allow USB access when Android asks. Some phones need OTG switched on in their settings.
The chip is not detected, or the ID changes
Check pin 1, clean the clip contacts and press the clip firmly. On a board, other parts can load the bus: hold the board without power, or remove the chip and use a socket. Try SPI Timing → Slow commands.
Erase or write stops at "protected"
Keep Unprotect Protected Chips on, check the WP pin contact and try again. If it still fails, share the report.
Verify failed
The chip does not match the file. Improve the contact, keep the cable still and program again.
The file is refused
It is larger than the chip or not a valid BIN / Intel HEX file. Use the firmware for this exact chip.
Still stuck?
After a failed operation, use Share report if you choose to send detailed diagnostics, or contact us via Support. Automatic technical success reports are separate and can be switched off in Settings.